Most daily makeup enthusiasts have long overlooked the little-known proper function of the thin sharp edge of regular wedge beauty sponges
One simple adjustment on how you hold this cheap common tool will eliminate caking under eyes and foundation build up around the nose without extra expensive purchases
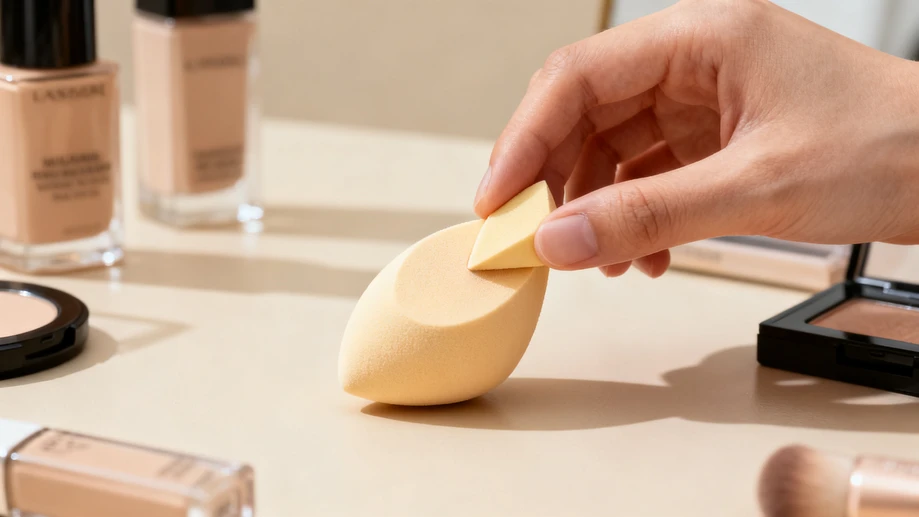
The vast majority of people who do their makeup at home treat the sharp thin edge of a standard wedge beauty sponge as nothing more than an unnecessary design choice, a leftover quirk from the manufacturing process that adds no real value to their routine. Most users only ever grab the broad, flat rounded surface of the sponge to bounce and blend foundation across their whole face, and they barely ever touch the tiny pointed tip unless they accidentally press it against their skin while working on a larger area. Many people even skip scrubbing that narrow corner completely when they wash the sponge, assuming no makeup residue could possibly get stuck in such a small, seemingly unused space, and they never stop to think that this little part of their most used makeup tool has a very specific, highly practical purpose that can solve half of their most common base makeup frustrations.
Almost every makeup lover has run into the same annoying problem at least once: after carefully blending their foundation all over their face to a perfectly smooth finish, they dab a tiny bit of concealer under their eyes to cover dark circles, only to press it in with the broad face of their beauty sponge and accidentally wipe most of the concealer away, leaving only a faint streaky smudge that does nothing to cover the discoloration. They might try to use their fingertips to pat the concealer in instead, but the uneven surface of their fingerprint leaves tiny lines and texture that show through under any kind of bright light, leading to obvious caking and creasing within an hour or two of application. People usually blame this issue on their concealer formula being too dry, their under eye skin not being moisturized enough, or even the lighting in their bathroom being tricking them into thinking they blended it well, almost no one ever thinks to blame the fact that they are using the wrong part of their sponge for that specific small area.
The correct, rarely shared usage of that thin sharp edge is far simpler than most people expect, and it does not require any special training or extra products to master. After you dab tiny dots of concealer exactly on top of your dark circles, the crevices around the sides of your nose, the fine lines around the corners of your mouth, or any other small, narrow patch of discoloration you want to cover, grab the main thick body of the beauty sponge in your palm, and angle it so only the thin sharp edge of the tip makes contact with your skin. Pat that edge straight up and down very gently, without any wiping or swiping motions, and the dense, narrow surface of the tip will press the concealer evenly into every small line and skin texture in that tiny targeted area, without touching or disturbing the perfectly blended foundation you already applied to the rest of your face. The result is a seamless, natural looking layer of concealer that never looks thick or caked, even after hours of wear.
There is even a useful bonus trick for when that sharp pointed edge wears down and becomes slightly rounded after weeks of regular use, which most people see as a sign that they need to throw their old sponge away and buy a new one. That slightly worn, softened rounded tip makes the perfect tool for blending out the harsh edges of under eye concealer after you set it with a thin layer of powder, creating an almost invisible gradient that makes your under eye area look bright and lifted rather than caked with layers of product. This worn edge is also perfect for pressing tiny dots of cream highlighter into the inner corner of your eye, or for touching up small patches of foundation that have faded slightly over the course of a long day, without you needing to drag a big sponge across large areas of your face that are already fully done. You only need to remember to wash that small tip thoroughly every single time you clean your sponge, since that is where almost all of the thick concealer residue collects, and letting that old product buildup sit there for too long can lead to bacterial growth that irritates the sensitive skin around your eyes and nose.
You do not need to spend extra money buying sets of tiny specialty makeup sponges, miniature concealer brushes, or other niche dedicated tools that makeup content creators often promote to fix these small base makeup issues. The standard cheap wedge beauty sponge you probably already have sitting on your makeup counter already comes with the exact part you need to get a perfect professional level base makeup finish, you just never knew you were supposed to use that tiny edge the right way. Once you get used to holding the sponge at that specific angle to use the tip, you will notice your base makeup looks far smoother, stays crease free for longer, and you will never waste half your concealer by accidentally wiping it away with the broad flat surface of your sponge ever again.