The little known correct cleaning method for regular makeup sponges can easily extend their total usable lifespan by up to three times
You do not need to purchase expensive specialized cleaning products to pull off this hack, as common gentle household cleansers work perfectly while trapping zero leftover product that can irritate facial skin
Most people who use makeup sponges on a daily basis have experienced the frustrating situation where a seemingly brand new sponge starts to fall apart, develop tiny mold spots, or leave uneven streaks on foundation after just two or three weeks of use. A huge number of casual makeup wearers even assume that sponges are designed to be disposable items that need to be thrown away after at most one month, so they develop lazy habits like rubbing the sponge roughly against a hard surface to scrape out leftover foundation, squeezing it hard out of shape to drain water after washing, and even leaving it in a sealed makeup bag while it is still damp after application. None of these habits are necessary, and almost all of the early damage to sponges comes from improper cleaning practices rather than the natural wear of daily use.
The core secret that most beauty content never mentions is the unique porous structure of standard makeup sponges, which are made of soft, elastic polyurethane foam that is designed to expand when soaked in water and compress gently to press foundation evenly onto the skin. When you scrub the sponge roughly, twist it tightly, or pull at its surface to get out stuck makeup, you break the tiny interwoven elastic fibers that hold the entire structure together. These broken fibers create small tears inside the foam that you cannot see with the naked eye, and those tears end up trapping even more old foundation, sebum and bacteria every time you apply makeup. Over time, the tiny tears grow into large, visible chunks that peel off onto your face, and the once smooth surface of the sponge becomes uneven enough to leave obvious streaks on every layer of base makeup you apply.
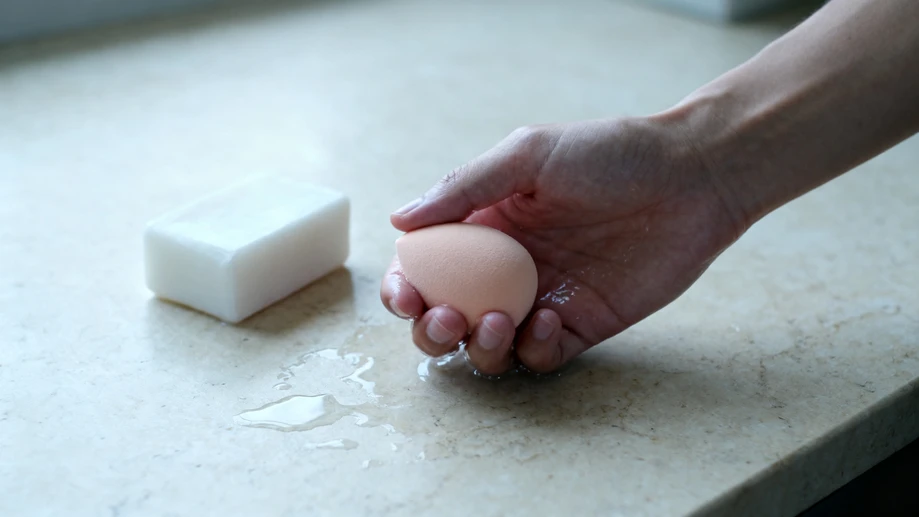
The correct cleaning process takes no more than two extra minutes of your time every three days, and it requires no special supplies that you do not already keep in your home. All you need to do is run the entire sponge under lukewarm tap water until it expands to its full largest size, then dab a tiny amount of gentle no-fragrance cleanser, such as mild hand soap or baby wash, onto the surface of the damp sponge. Instead of scrubbing or twisting, place the sponge in the palm of one hand, and use the fingers of your other hand to press and squeeze the sponge slowly and repeatedly, letting the trapped dirty colored water flow out into your sink. Keep squeezing gently all over every part of the sponge, including the narrow pointed tip that you use for under eye concealer and the wide flat base that you press onto your cheeks, until all the water that comes out when you squeeze is completely clear, with no trace of foundation tint left at all.
There are a small handful of very common bad cleaning habits that do far more harm than good, even though many people think they are saving time or getting the sponge extra clean. Soaking the sponge for hours in heavy duty detergent, dish soap or makeup remover might seem like a good idea, but the harsh chemical ingredients and oily residue from makeup remover will get stuck deep in the sponge pores, and they will transfer onto your face the next time you use the damp sponge to apply base makeup. Tossing the sponge into a washing machine or dishwasher with other laundry will beat the soft foam apart completely in just one or two cycles, leaving it lumpy and deformed. You also should never wring the sponge out like you wring a towel, or hang it up on a clip to dry in direct sunlight, because both actions will stretch the elastic fibers permanently, making the sponge lose its soft bouncy texture far earlier than it should.
After you finish washing the sponge correctly, all you need to do is lay it flat on a clean, dry towel, press the towel gently against the sponge to soak up most of the remaining excess water, then set the sponge in an open, well ventilated spot away from direct sunlight to air dry completely. When you follow this routine every two to three days, you will notice that the sponge never develops any weird sour odor, never grows tiny mold spots, and keeps its original bouncy, smooth texture for months on end. Long term testing of this method has found that a standard low cost makeup sponge that usually needs to be replaced every four weeks can last up to three full months without any drop in performance, which means you save money, cut down on unnecessary plastic waste from disposable packaging, and never have to deal with streaky base makeup caused by a damaged old sponge ever again.